Did you know that you can navigate the posts by swiping left and right?
Interactive Video Table
26 Aug 2019
.
Tech
#dhdc
#raspberry-pi
#python
Intro!
DHDC is a Discovery Center in Amarillo Texas. Its a 501.c3 non-profit that teaches kids of all ages about the world around us. From How Electricity Works, to Dinosaurs and Fossils to games about Simple Machines! They also have a rotating list of exhibits so what’s on display changes from month to month.
More recently they’ve started building out exhibits of their own to help keep things fresh and to lend out to other discovery centers around the country. One of those exhibits I got to help out on.
Needs!
I got brought in to help build something relatively interactive. They were building a couple tables with some screens and they wanted the content to change based on simple user-input. Sounds like a Raspberry pi project to me! For some extra help, I brought in one of my coworkers thats a bit more familiar than I am with Python. Some of the solutions/actions below were his!
Some requirements!
- It needs to be Easy to update with new video - Exhibits change! Dont hard-code anything. Don’t require a SWE to update
- Easy to swap out new parts - Kids break things, Stuff fails, lets make it easy
- No monthly cost - Noone likes monthly costs, especially non-profits. Why add yet another cost to keep up with!
- Work Offline - Wifi can get expensive when you have 15-200 people on it!
- Cheap - Shouldn’t be powered by some i7 monster. Commodity is the name of the game
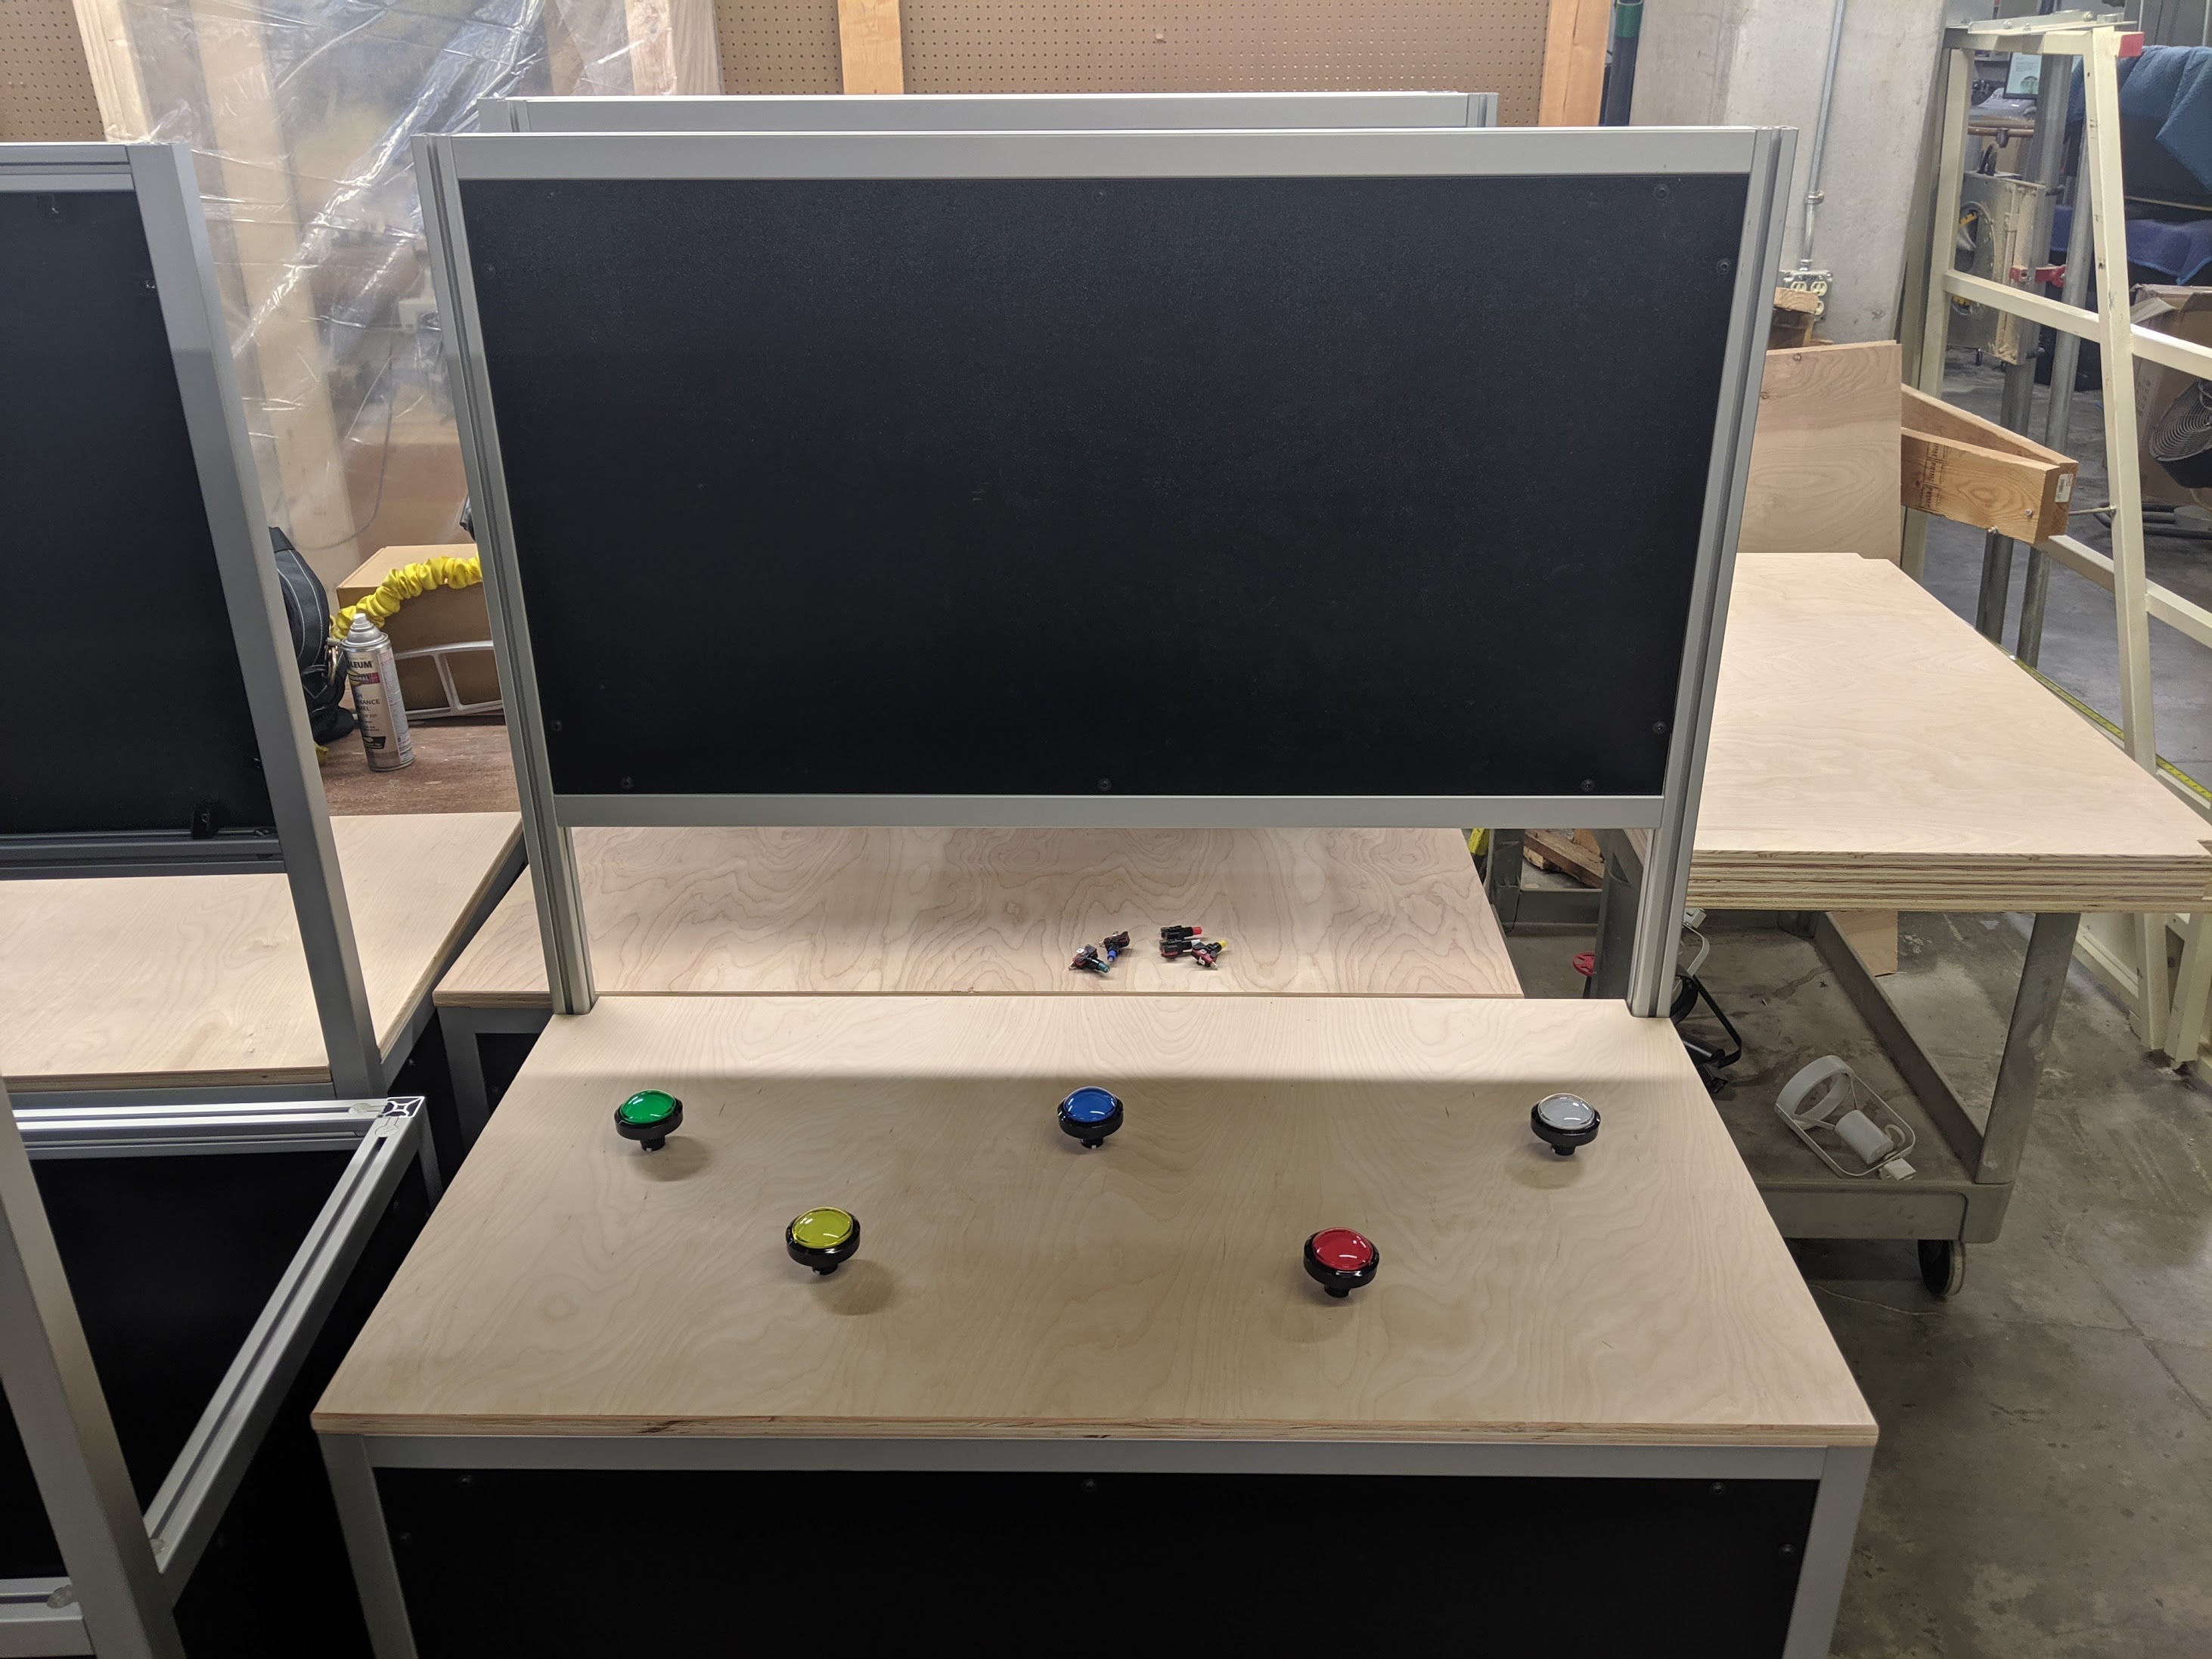
 Bare table. Frame made of 80/20 Aluminum extrusion. TV About to be mounted.
Design
Buttons!
We decided to go simple. Grab some “Arcade” style large pushbuttons (non-latching) that are cheap and easy to replace (Kids love to whack on things). The raspberry pi makes this WAYY easy. There is no need to use some analog to HID usb controller to emulate keyboard keys or anything. The switches can be hooked to ground and to a GPIO. When the button gets pressed, the GPIO gets pulled low
Videos!
Videos should be stored locally. No need to go pluck videos from google drive/youtube etc. These shouldn’t change very often and the quieter we can be on the network the better! Lets store them simply in the /home/pi/Videos directory.
Display!
Why make things complicated. We’ll go with a standard TCL TV and connect the pi over HDMI. This passes in video AND audio and will let the TV control the volume! So they have direct and easy access to turn on/off the display and to change the volume with a normal IR remote
Implementation
I’m not super familiar with any programming/scripting language (I’m more of a syadmin than a developer!). I would really like to learn more python though, so I chose that for this particular project.
The code ended up being relatively straight forward! I’m using a VLC instance to play the videos and a different video gets loaded when a button is pressed.
To do this, first we load up the GPIO pins. We’re setting them to pull_up so that the GPIO pin floats to 3.3v. When the button is pressed, the pin is grounded out, causing it to drop to zero volts. This voltage change is detected by the pi as a button press:
# Configuring GPIO pin operation
print("configure each pin")
GPIO.setup(R_BTN_GPIO, GPIO.IN, pull_up_down=GPIO.PUD_UP) # configure Button X for input and for the internal pullup resistor
GPIO.setup(G_BTN_GPIO, GPIO.IN, pull_up_down=GPIO.PUD_UP) # This means the GPIO should float to 3.3v
GPIO.setup(B_BTN_GPIO, GPIO.IN, pull_up_down=GPIO.PUD_UP) # When the switch is connected to ground, it should pull the GPIO to 0v
GPIO.setup(Y_BTN_GPIO, GPIO.IN, pull_up_down=GPIO.PUD_UP)
GPIO.setup(W_BTN_GPIO, GPIO.IN, pull_up_down=GPIO.PUD_UP)
Once the pins are setup, we need to kick off a base video loop. They wanted a base video/animation to play when a button hasn’t been pressed. When a button does get pressed, load up that particular video, play it, and then return to the base video loop:
# Starting Loop for button presses
while True: # Loops every .1sec to check and see which buttons are pressed
    if not GPIO.input(R_BTN_GPIO):
        play_video(VIDEO_1)
    if not GPIO.input(G_BTN_GPIO):
        play_video(VIDEO_2)
    if not GPIO.input(B_BTN_GPIO):
        play_video(VIDEO_3)
    if not GPIO.input(Y_BTN_GPIO):
        play_video(VIDEO_4)
    if not GPIO.input(W_BTN_GPIO):
        play_video(VIDEO_5)
    t.sleep(.1)
While this is certainly not the most efficient way to handle button presses, it works nicely. This ensures a particular button takes priority over the others and several videos aren’t loaded at once. This also makes it really easy to bake in a ‘cooldown’. Inside each of the play_video() functions theres a simple t.sleep(x) where x is a cooldown time. For that time, any additional button presses are ignored
Next is actually playing the video. I struggled with this part for a while. Turns out the omxplayer video player that is optimized for the pi gpu doesn’t support any sort of queueing. A huge bummer. Theres also not a good way to play a different video immediately after another (Returning to the base video loop). SO, after a bit of experiementation, I settled on VLC.
VLC has a few benefits that didn’t originally come up. Namely, it plays just about anything under the sun. If the discovery center toss in a .mkv in one directory and a .avi in another, no problem! VLC also has built-in queueing support.
I cheated here. VLC does have a looping option that lets you loop over a playlist (player.set_playback_mode(vlc.PlaybackMode.loop)). Also, it turns out you can add a video, skip to it, and immediately remove it from the playlist and it’ll continue! When its done, it’ll simply loop over whats left in the playlist, the base video.
# defining playvideo()
def play_video(video):
    playlist.insert_media(instance.media_new(video),1)
    player.play_item_at_index(1)
    t.sleep(3)
    playlist.remove_index(1)
Ensuring the program would kick off on boot was relatively easy. This changed (it seems) in raspbian buster, but simply adding @python /home/pi/dhdc-video-table/main.py to the file /etc/xdg/lxsession/LXDE-pi/autostart ensures that the program gets loaded when the desktop environment is started (Not on system startup, but on desktop login!). While this would get launched (and likely fail) for other users on the system, we don’t really need to worry about it. Its purpose built and there are no other users!
To make installing new videos easy, we can even delay taking over the display until a button is pressed for the first time. This means when the pi is first booted, it’ll drop right into the desktop and auto-mount any flashdrive plugged in. A simple mouse and keyboard to drag new files into the Videos directory and we’re good to go!
print("Waiting for first button press")
# Loops every .1sec to check and see which buttons are pressed
while (
        GPIO.input(R_BTN_GPIO) and
        GPIO.input(G_BTN_GPIO) and
        GPIO.input(B_BTN_GPIO) and
        GPIO.input(Y_BTN_GPIO) and
        GPIO.input(W_BTN_GPIO)):

    t.sleep(.1)
Theres a few other tweaks that I had to make and some problems that had to be overcome. The main PITA was the “Flash to Desktop” that you’d get when VLC ends one video and starts the next. Apparently its a known issue because VLC destroys the framebuffer between videos. It has supposedly been fixed, just not on mine :/
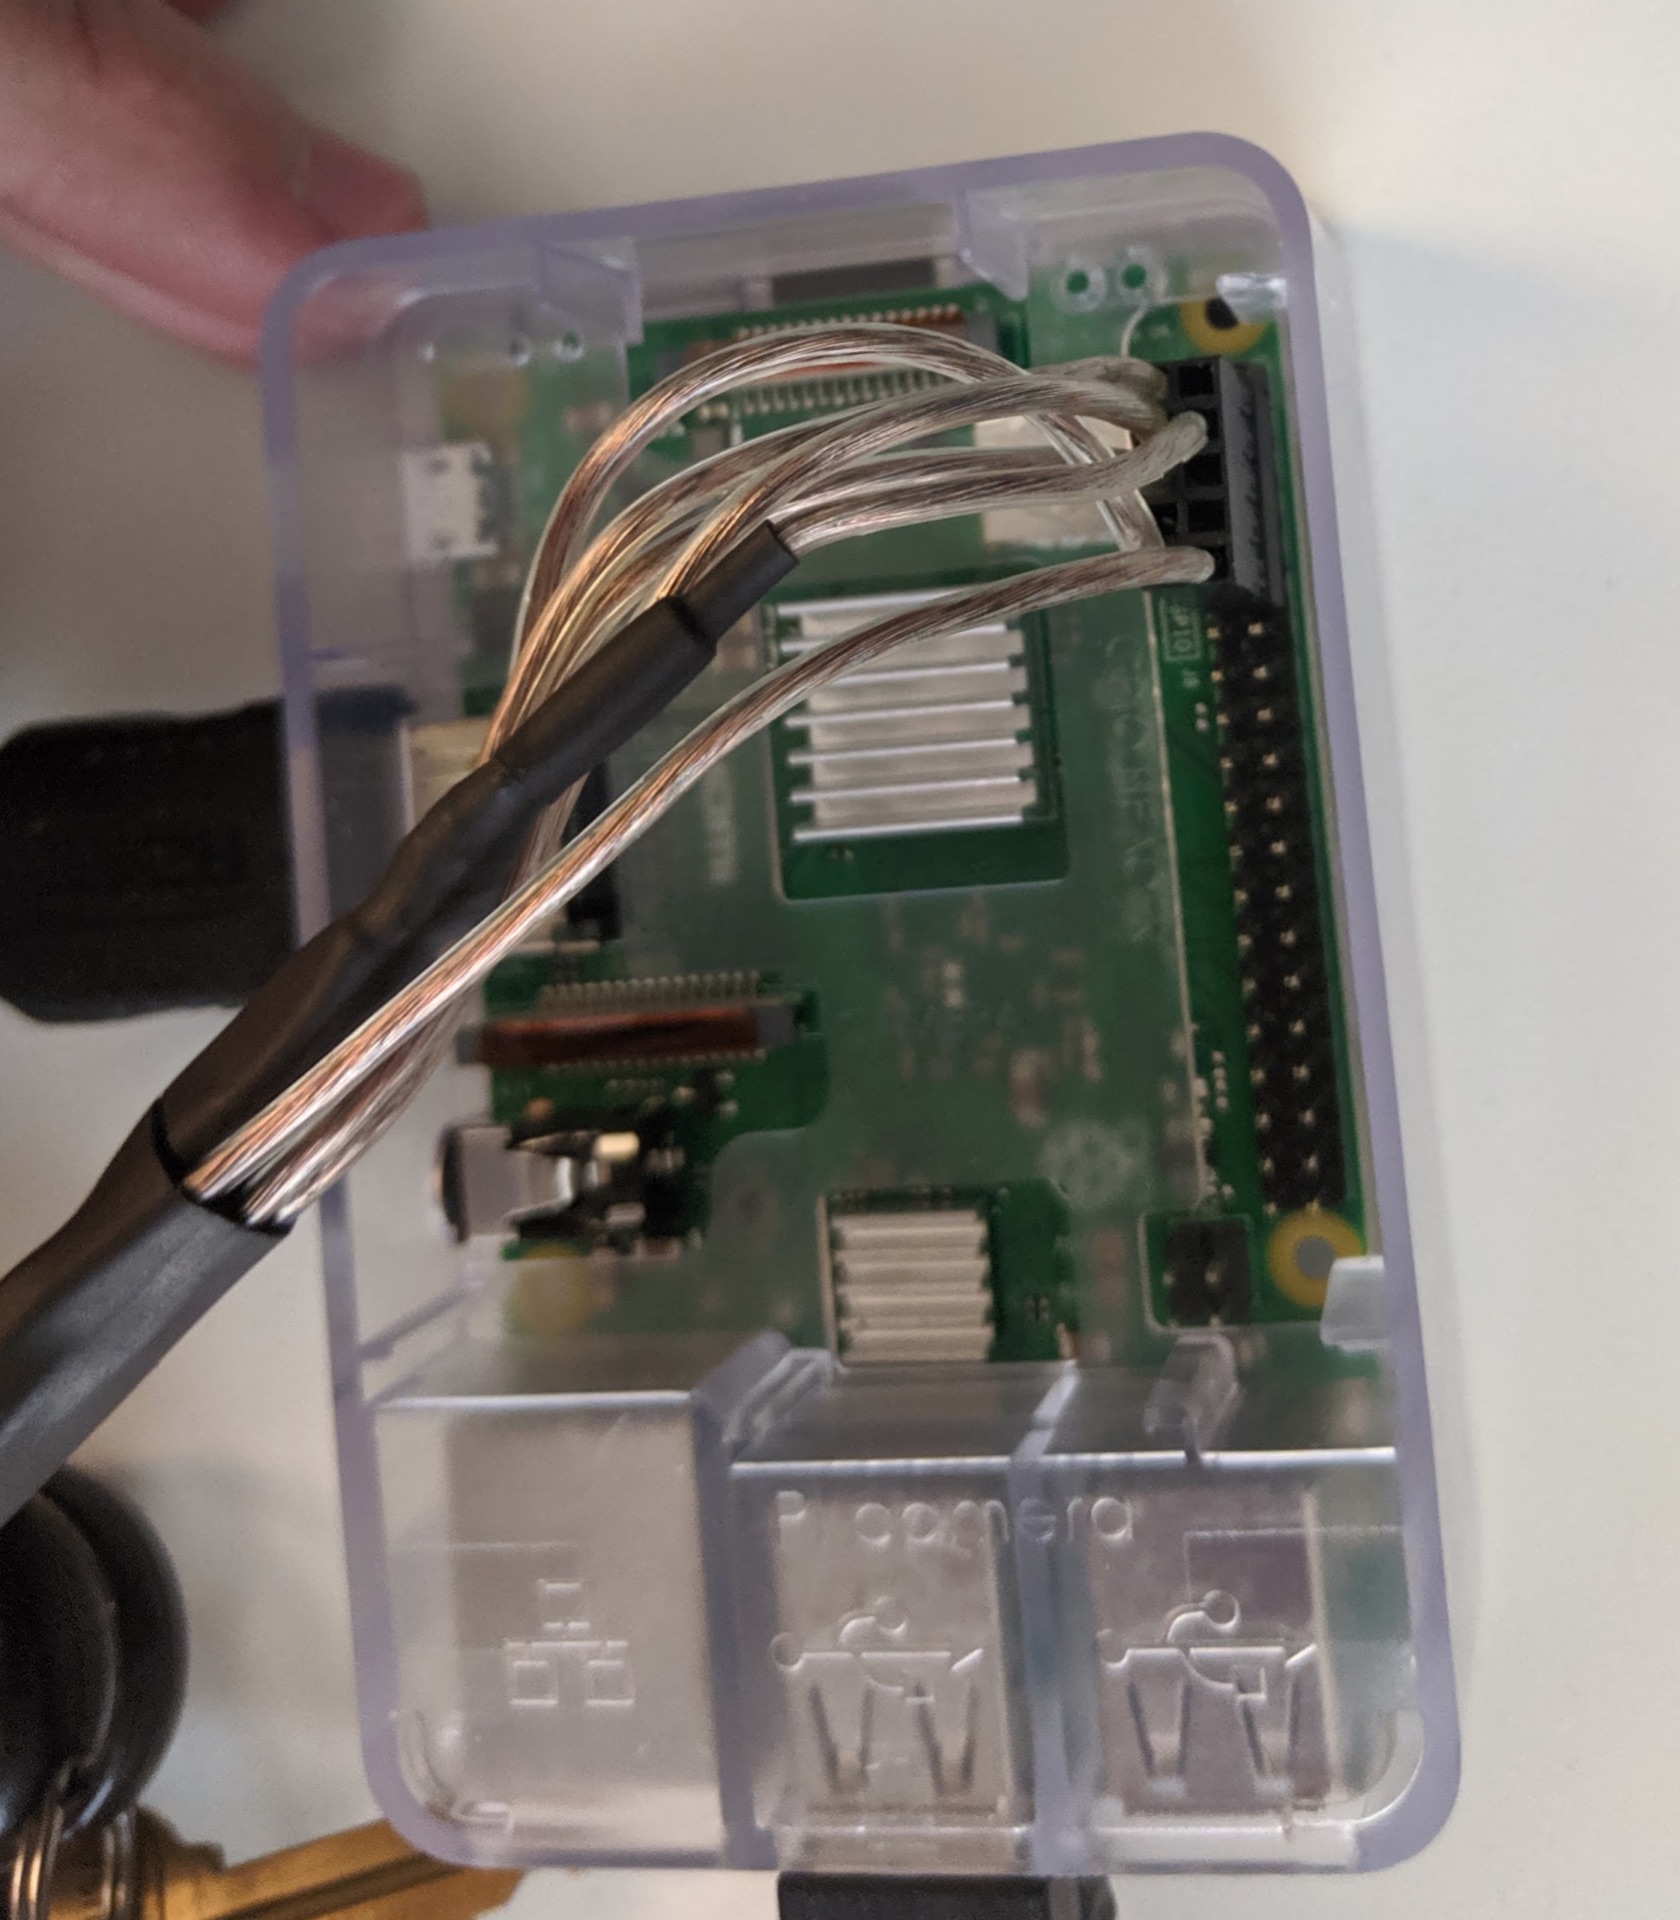
I also decided to clean up the wiring a bit! As such, a coworker lent me a nice JST crimping kit and I made some wire harnesses. When I shipped the pi’s back to Amarillo, I included these harnesses and some spade crimp-on connectors to give it a really clean and polished look.
 Wire harness. Extra long so it can be clipped and terminated when installed
Installed!
There are likely a LOT of things that can be tweaked and made ‘more proper’ and closer to a proper python style guide. If the reader stumbles across one and/or has a suggestion, let me know! I’m always game to learn! -> corey@rawlk.com .
When I shipped the pi out, I created two more copies. One more for immediate install and one as a ‘hot spare’ that can be stored next to them. While I don’t have direct remote access, they do have SSH set up with a keypair and git creds so I should be able to get to them by something else on the network if an upgrade is needed.
They haven’t been deployed long, but they seem to be going well. Maybe in the next version I’ll make some tracking/analytics. Just to see how often buttons are smashed and maybe even detect when a button may be failing? The sky is the limit with raspberry pi’s :P
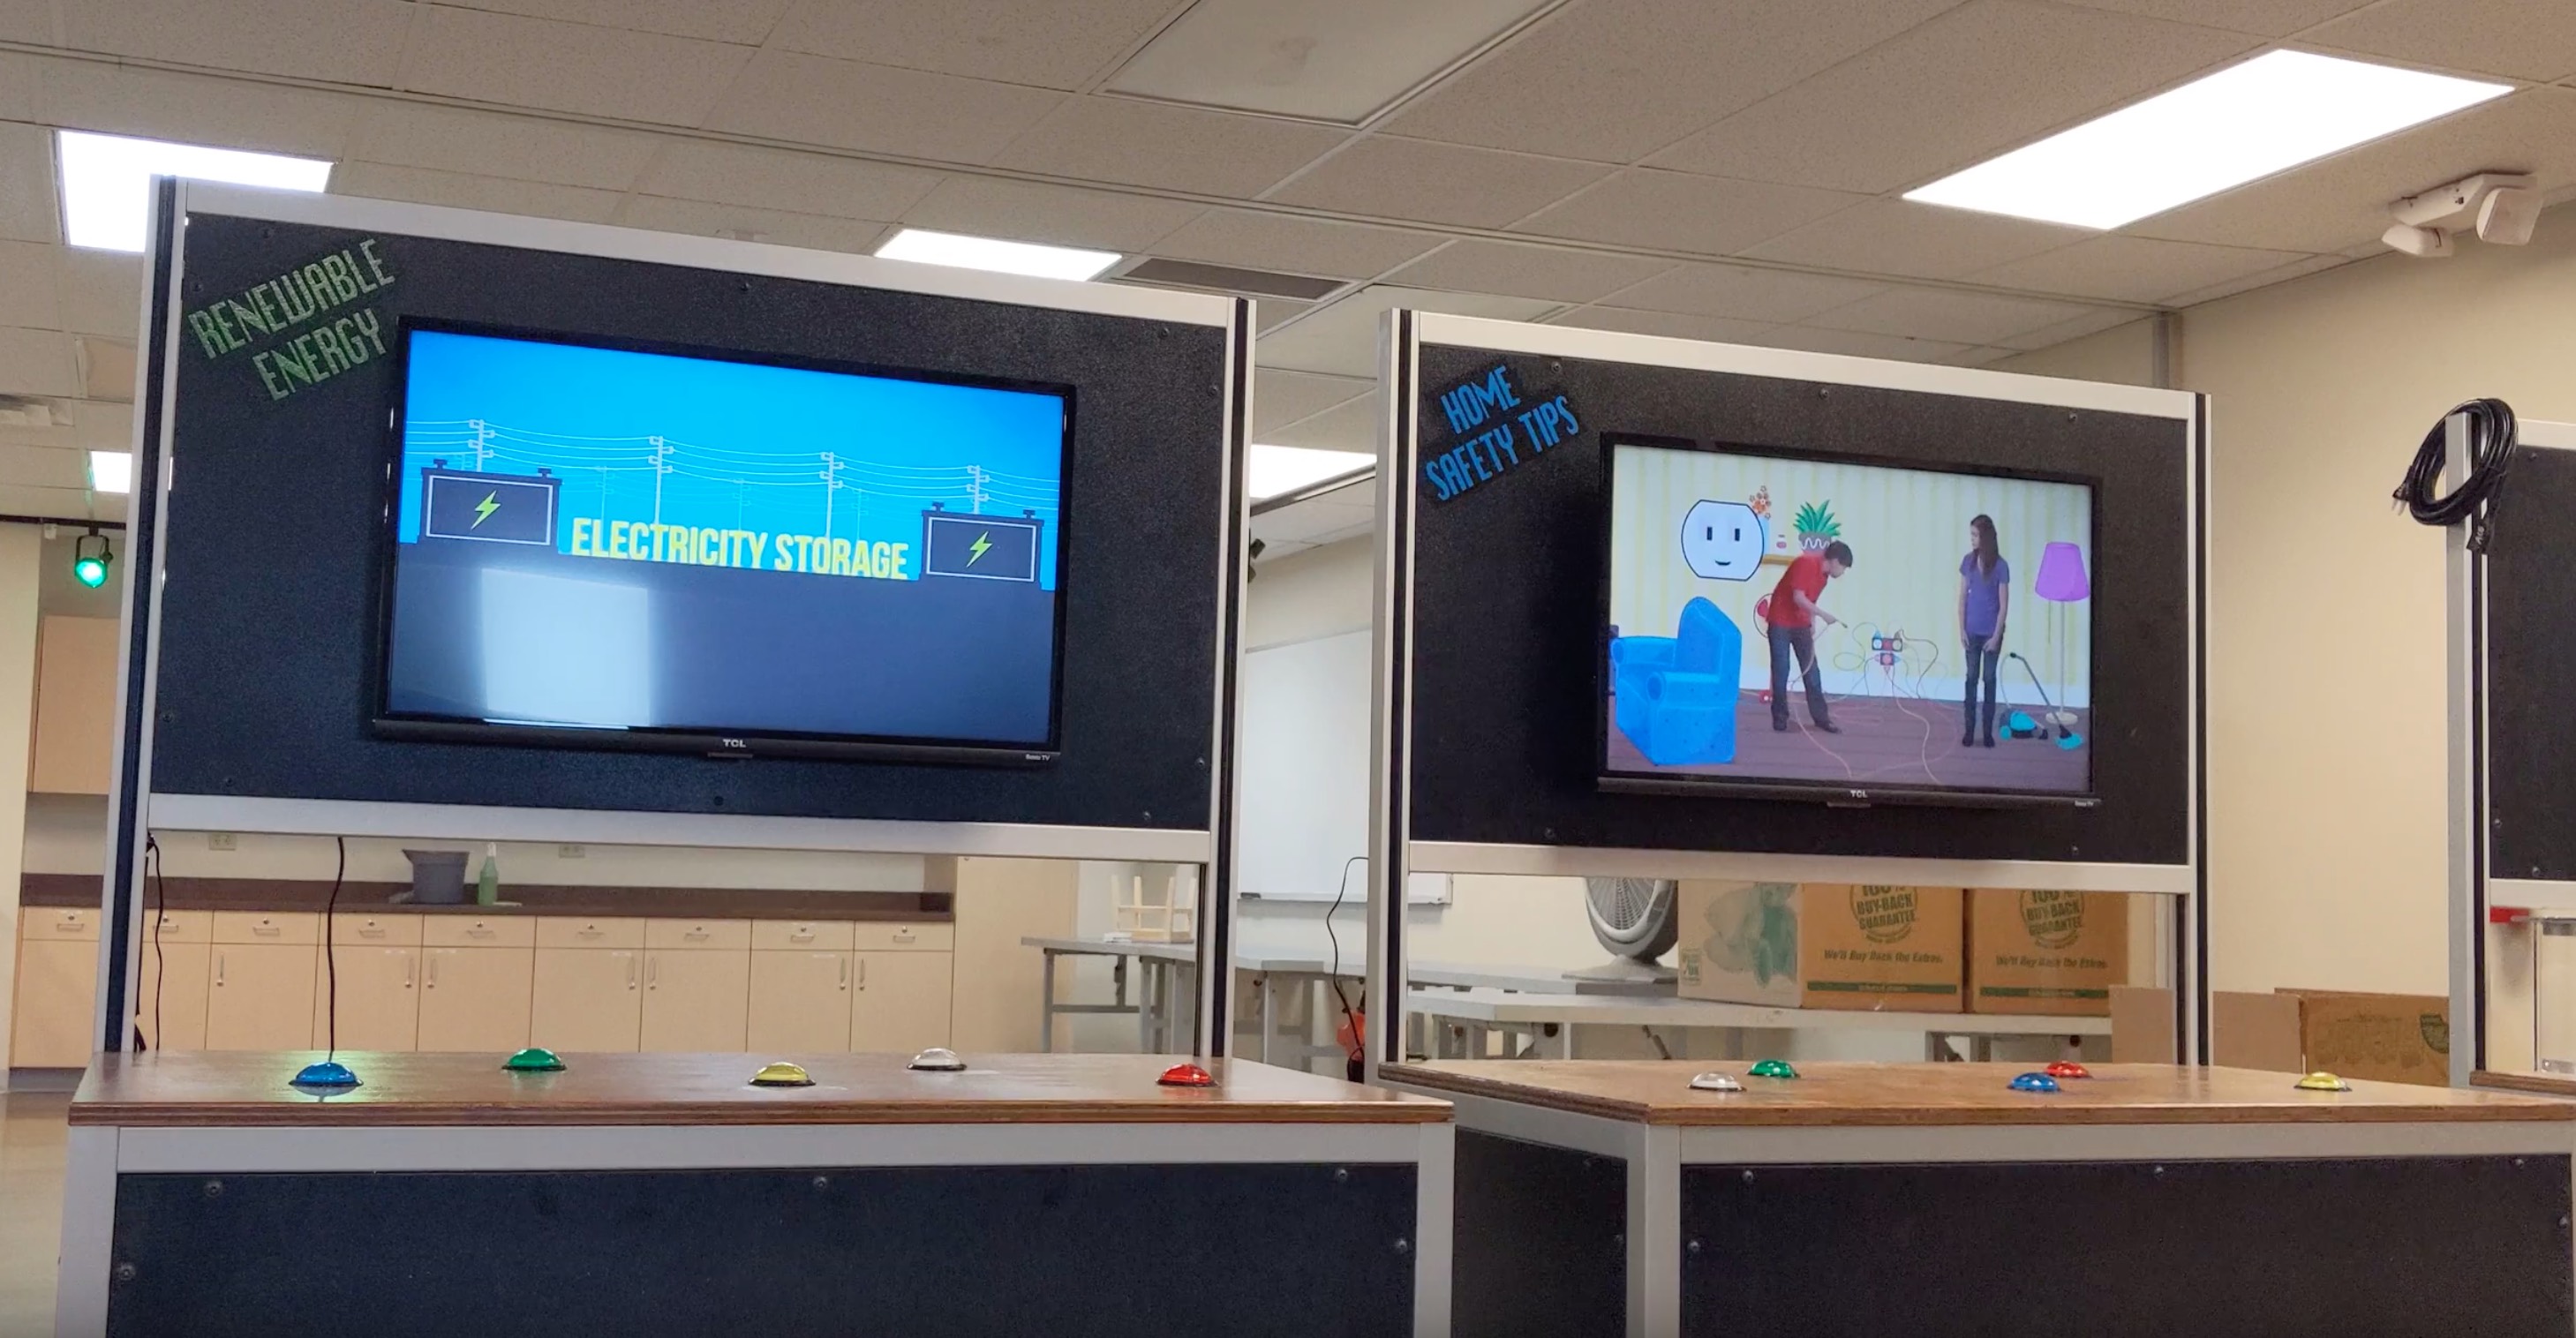
 Installed and running!
More pictures here! -> Google Photos